Advanced Ultrasonic Test Applications (AUT)

Phased Array Ultrasonic Inspection
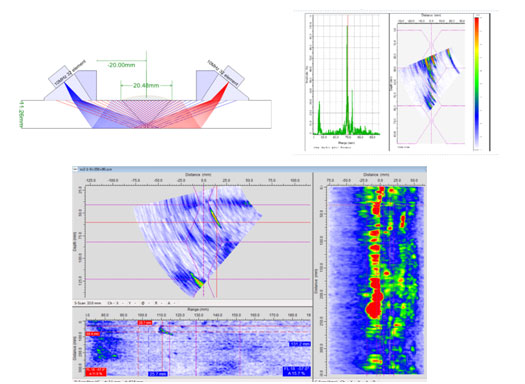
Ultrasonic phased arrays are a novel technique for generating, receiving and imaging ultrasound. Instead of a single transducer and beam, phased arrays use multiple ultrasonic elements and electronic time delays to create beams by constructive and destructive interference. As such, phased arrays offer significant technical advantages for weld testing and plant monitoring over conventional ultrasonic as the phased array beams can be steered, scanned, swept and focused electronically from a fixed probe position. Beam steering permits the selected beam angles to be optimized ultrasonically by orienting or focussing them perpendicular to the predicted discontinuities, for example lack of fusion in automated weld inspections.
Advantages of Ultrasonic Phased Arrays
Phased arrays allow real-time control of three important ultrasonic probe parameters
- Focal distance: continuously and dynamically adjustable
- Beam angle: continuously and dynamically adjustable
- Focal spot size: dynamically adjustable
Extra benefit
- Multiplexing allows fast displacement of ultrasonic beam within probe
Main benefits of ultrasonic phased arrays
- High-speed inspection using single-axis scans instead of conventional raster scan
- Near-optimal focal length and focal spot for various areas of complex parts or thick components
- Small, simple probe assembly with multiple beams from a single probe
- Easy-to-install, one-axis scanning systems
- Better detection in austenitic materials and dissimilar metal (DM) welds
- Alternative to Radiographic imaging.

TOFD (Time of Flight Diffraction)
TOFD and its principles are well documented. Utilizing diffracted energy in the detection of flaws, the technique is less reliant on flaw orientation and morphology than standard pulse echo techniques, leading to improved sizing and probability of defect detection (POD). Additionally, computerized electronic data capture and storage, in conjunction with scanning manipulators enable rapid scanning speeds to be achieved TOFD has now been accepted as an alternative to Radiography in Pre-Service Inspections with standards such as ASME Section V Appendix III , and its use in pipe weld and thick walled pressure vessel fabrication is now common place.
Due to it`s sensitivity and sizing accuracy, TOFD is also an excellent tool for in-service material and flaw monitoring. Engineers who are monitoring root erosion, stress corrosion cracking, vessel cladding, Hydrogen Attack, Weld and Steam Chest cracks for example, are all now utilizing TOFD as part of an ongoing inspection regime.
Integrity NDT personnel have over 10 years of experience in planning, managing and carrying out TOFD on pre-service and in-service projects, around the globe. We can advise and develop TOFD procedures and have developed specialist scanning equipment for carrying out inspections.
